Last Updated: May 17, 2026
The impact of shading on solar panel output is one of the most underestimated problems in residential solar installations, and it costs homeowners measurable energy production every single year. At Discount Solar, we’ve seen firsthand how a single shaded panel can drag down an entire system’s performance far beyond what most buyers expect when they sign their installation contract. Below, we’ll show you exactly how shading degrades power output, what causes it, how to calculate your losses, and which mitigation technologies actually deliver on their promises. The 5 strategies we cover have helped homeowners in Bakersfield and Kern County recover substantial portions of their annual energy production.
Here’s what most guides get wrong: they treat shading as a minor inconvenience. It isn’t. It’s a system-level problem that compounds over time.
How the Impact of Shading on Solar Panel Output Actually Works
Shading loss is the reduction in electrical output that occurs when obstructions block solar irradiance from reaching photovoltaic (PV) cells. Understanding the mechanism matters because it explains why even small shadows cause disproportionately large drops in power output.
Solar panels generate electricity through the photovoltaic effect: sunlight excites electrons in silicon materials, creating an electrical current. Cells are wired in series within a module, and modules are wired in series within a string. This architecture is efficient under full sun, but it creates a critical vulnerability under partial shading conditions.
The Christmas Light Effect: Why One Shaded Cell Hurts the Whole String
The Christmas light effect is the most accurate analogy for understanding series-wired solar arrays. When one bulb burns out in an old-style string of Christmas lights, the entire strand goes dark. The same principle governs a solar array wired in series: the current through the entire string is limited by its weakest cell.
A single shaded cell doesn’t just lose its own output. It acts as a bottleneck, dragging down the current for every other cell in that string. This means one shadow covering 5% of a panel’s surface area can reduce the output of the entire string by a far larger percentage. The shaded cell can even become a current consumer rather than a producer, generating heat rather than electricity.
How Bypass Diodes Limit the Damage
Bypass diodes are protective components wired in parallel across groups of solar cells within a module. When a section of cells is shaded and its voltage drops below the rest of the string, the bypass diode activates and routes current around that section, preventing it from dragging down the entire module.
Most standard solar panels contain three bypass diodes, dividing the module into three sections. If one section is shaded, the diode bypasses it and the panel loses roughly one-third of its output rather than collapsing entirely. This is meaningful protection, but it’s not a complete solution. The shaded section still produces nothing, and the power loss is real.
Key TakeawayBypass diodes reduce shading damage but don’t eliminate it. A panel with one shaded section still loses approximately one-third of its rated output, regardless of how much sun hits the other two sections.
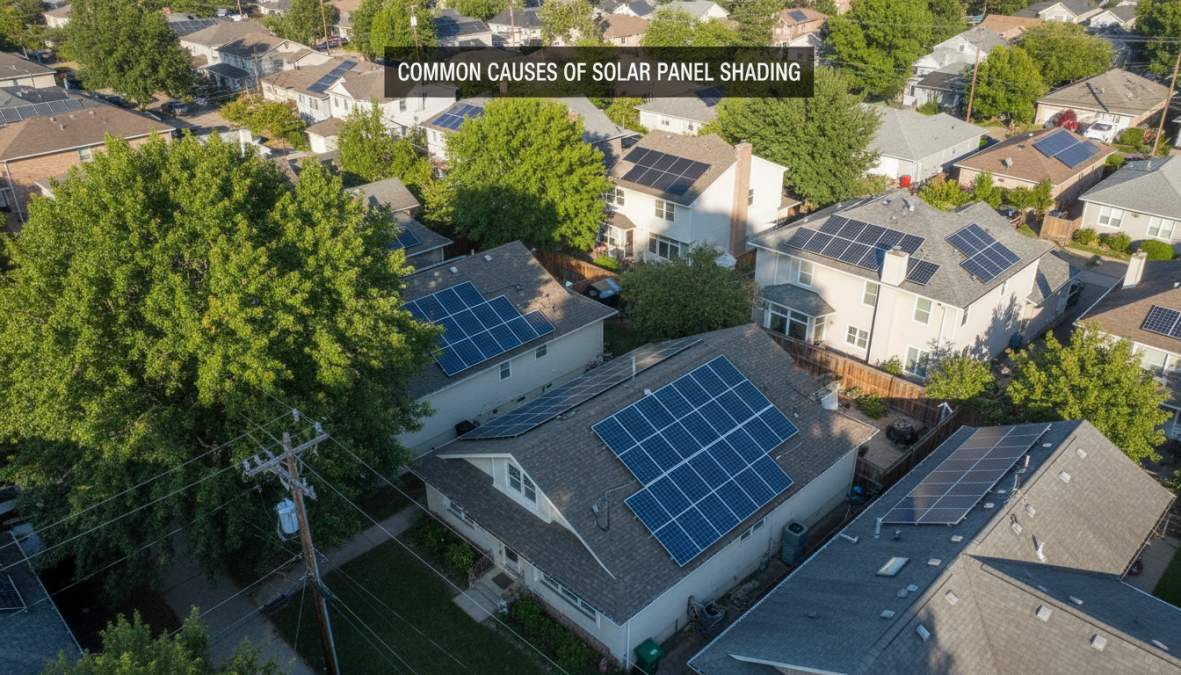
Common Causes of Solar Panel Shading on Residential Rooftops
Most shading problems on rooftop installations fall into predictable categories, and identifying them before installation is the single most effective way to protect your system’s performance.
The primary causes of solar panel shading in residential settings include:
- Trees and vegetation: The most common culprit. Trees that seem distant during a site assessment in winter can cast significant shadows during summer mornings or late afternoons when the sun angle is lower.
- Chimneys and roof vents: Fixed obstructions that cast moving shadows as the sun tracks across the sky throughout the day.
- Neighboring structures: Fences, outbuildings, or adjacent homes that shade panels during specific hours.
- Roof geometry: Dormers, parapets, and complex roof lines create self-shading where one section of the array shadows another.
- Satellite dishes and HVAC equipment: Often overlooked during initial assessments but capable of casting long shadows in morning and evening hours.
- Soiling and debris: Bird droppings, leaves, and dust create localized shading that mimics structural obstruction. Unlike fixed shadows, these are correctable with cleaning.
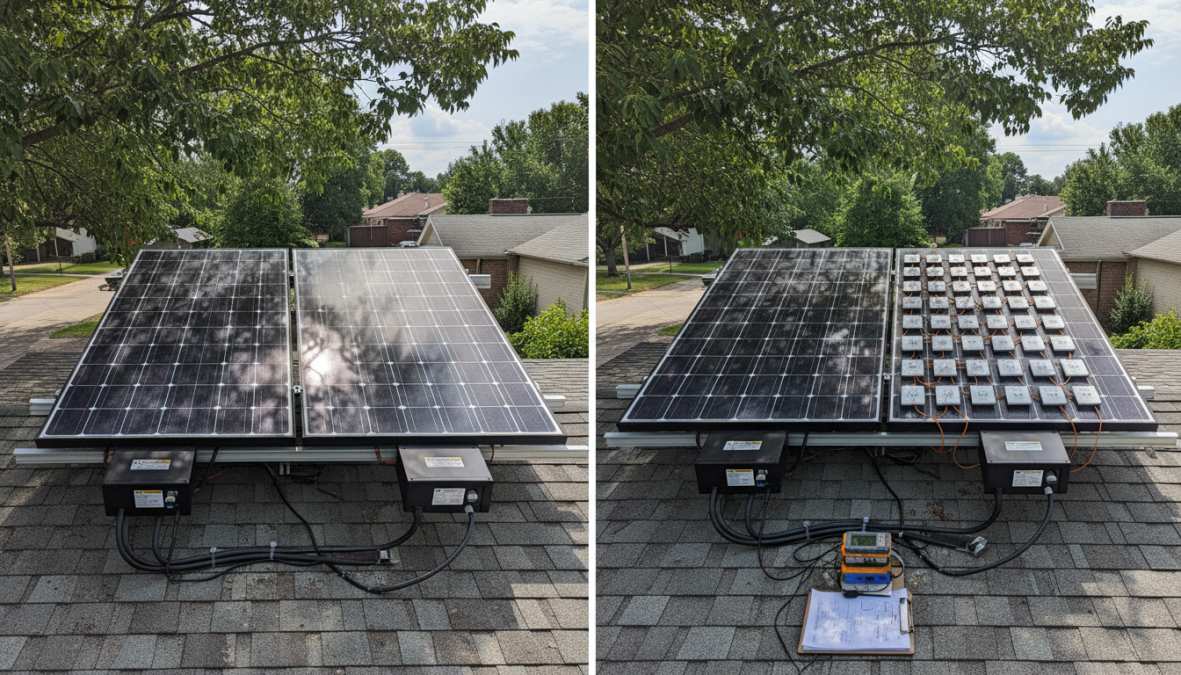
A common mistake homeowners make is relying solely on a visual inspection from ground level. A proper shade analysis requires solar irradiance mapping across the roof surface across all seasons and hours of the day, not just a quick look on a clear afternoon.
According to the National Renewable Energy Laboratory’s resource on solar site assessment, accurate shade analysis tools like the Solar Pathfinder or digital shading software are essential for predicting annual energy production losses before installation.
Solar Panel Output Loss Calculation: What the Numbers Look Like
Calculating shading loss requires understanding how partial shading interacts with your system’s architecture. The math isn’t complicated, but the results often surprise homeowners.
The baseline formula for estimating shading impact is:
Estimated Annual Loss = System Capacity (kW) x Shading Loss Factor x Peak Sun Hours x 365
For example: a 6 kW system in Bakersfield, CA, with an estimated 15% shading loss factor and 5.5 peak sun hours per day would lose approximately 1,808 kWh per year. At typical California electricity rates, that’s a meaningful reduction in the savings that motivated the installation in the first place.
The shading loss factor itself varies significantly based on system design:
- String inverter systems: shading loss is amplified because the entire string underperforms
- Microinverter systems: each panel operates independently, so shading loss is localized
- Power optimizer systems: similar localization benefit to microinverters with different architecture
Partial Shading vs. Full Shading: A Real-World Comparison
Full shading is straightforward: a panel completely blocked from sunlight produces essentially no power. Partial shading is more complex and, in many ways, more damaging relative to the obstruction size.
With partial shading on a string inverter system, a shadow covering one panel can reduce the output of every panel in that string. A homeowner with 12 panels on a single string might see 6 panels underperform because 1 panel is partially shaded by a chimney for two hours each morning. The energy loss is not proportional to the shadow; it’s magnified by the series architecture.
This is the core argument for investing in microinverters or power optimizers on any roof with known shading challenges. The upfront cost difference is real, but so is the long-term production difference.
Watch OutNever let an installer dismiss partial shading as “minor.” On a string inverter system, partial shading during peak production hours can reduce whole-system output by far more than the shadow’s physical size would suggest. Get the shading analysis in writing before signing.
Microinverters vs. Power Optimizers for Shading: Which Is Worth It?
For rooftops with any meaningful shading, the choice between microinverters and power optimizers is the most important technical decision in your system design. Both technologies address the core weakness of traditional string inverters, but they do so differently and with different trade-offs.
Microinverters convert DC power to AC power at the individual panel level. Each panel has its own inverter, so a shaded panel’s performance doesn’t affect its neighbors. Maximum power point tracking (MPPT) is performed independently for each module, meaning every panel operates at its optimal voltage regardless of what’s happening elsewhere in the array.
Power optimizers are DC-to-DC converters that condition the power from each panel before sending it to a central string inverter. Like microinverters, they perform per-panel MPPT, isolating shading losses to the affected module. Unlike microinverters, the central inverter still handles the DC-to-AC conversion.
| Feature | String Inverter | Power Optimizers | Microinverters |
|---|---|---|---|
| Shading tolerance | Low | High | High |
| Per-panel monitoring | No | Yes | Yes |
| System cost | Lowest | Medium | Highest |
| Single point of failure | Yes | Partial | No |
| Best for | Unshaded roofs | Mixed conditions | Complex/shaded roofs |
| MPPT | String-level | Per panel | Per panel |
The honest answer on cost-benefit: for a roof with no meaningful shading, a quality string inverter is a perfectly sound choice. For any roof with trees, chimneys, or complex geometry, the production gains from microinverters or power optimizers justify the premium over the life of the system. As documented in EnergySage’s solar inverter comparison guide, the production difference between string inverters and per-panel optimization technologies can be substantial on partially shaded arrays.
Solar Panel Shading Solutions Every Homeowner Should Know
The most effective solar panel shading solutions combine proactive site planning with the right hardware choices. Treating shading as something to fix after installation is always more expensive than designing around it from the start.
The practical toolkit for managing shading loss includes:
- Tree trimming or removal: Often the highest-ROI intervention. A single tree blocking morning sun for 20 panels can cost more in lost production over 25 years than the cost of removal.
- Panel placement optimization: Experienced installers can position arrays to minimize shadow exposure during peak production hours (typically 9 AM to 3 PM).
- Microinverters or power optimizers: As covered above, these are hardware-level solutions that limit the cascade effect of shading.
- Energy monitoring systems: Real-time monitoring identifies underperforming panels, allowing you to catch new shading sources (growing trees, new structures) before they compound.
- Array segmentation: On complex roofs, splitting a single large string into multiple smaller strings can limit the blast radius of any single shading event.
DIY Shade Analysis Before You Install
Homeowners can perform a meaningful preliminary shade assessment without professional tools. The goal is to identify obvious shading sources and flag them for your installer’s formal analysis.
DIY Shade Assessment Checklist:
- Stand on or near your roof at 9 AM, 12 PM, and 3 PM on a clear day. Note what casts shadows where.
- Photograph the roof from multiple angles, capturing all nearby trees, structures, and roof features.
- Check the height and distance of all trees within 50 feet of the planned array location.
- Use a free tool like Google’s Project Sunroof to get a preliminary shading estimate for your address.
- Note the roof’s orientation (south-facing is optimal in the Northern Hemisphere) and tilt angle.
- Identify any planned construction nearby that could introduce new shading sources.
- Ask your installer to provide a formal shade analysis report, not just a verbal assessment.
This checklist won’t replace a professional solar irradiance analysis, but it gives you informed questions to ask and flags obvious problems before you commit to a layout.
According to the U.S. Department of Energy’s solar installation guidance, homeowners who engage actively in the site assessment process tend to end up with better-positioned arrays and fewer post-installation surprises.
The Real Impact of Shading on Solar Panel Output Over Time
Short-term shading loss is frustrating. Long-term shading damage is a different problem entirely, and it’s one that most homeowners don’t learn about until it’s already affecting their system.
The impact of shading on solar panel output doesn’t stop at reduced electricity generation. Persistent partial shading creates conditions that accelerate physical degradation of the panels themselves.
Hot Spots, Module Degradation, and Long-Term ROI
Hot spots are localized areas of excessive heat that develop when shaded cells are forced to dissipate power as heat rather than convert it to electricity. A shaded cell in a string-wired panel can reach temperatures significantly above the rest of the module, and repeated thermal cycling accelerates degradation of the silicon materials and encapsulant.
The long-term consequences of unmanaged hot spots include:
- Accelerated module degradation: Panels experiencing regular hot spots degrade faster than their rated annual degradation rate, reducing both output and lifespan.
- Encapsulant discoloration: The protective layer around solar cells can yellow and delaminate under repeated thermal stress, further reducing light transmission.
- Cell cracking: Thermal expansion and contraction cycles from hot spots can cause microcracks in cells, creating permanent efficiency losses.
- Voided warranties: Some manufacturers include language around improper installation or persistent shading as grounds for warranty limitations.
The ROI calculation for a shaded system compounds negatively over time. Reduced annual energy production, faster module degradation, and potential warranty complications all erode the return on investment that made the system attractive in the first place. As outlined in the Solar Energy Industries Association’s homeowner resource guide, proper system design is the foundation of long-term solar ROI.
Discount Solar’s 25-year equipment warranty and custom installation approach are specifically designed to account for these long-term factors. Our certified installers conduct formal shade analysis as a standard part of every project, not an optional add-on.
Pro TipRequest a thermal imaging inspection of your panels every 3-5 years. Thermal cameras reveal hot spots invisible to the naked eye and allow you to address shading-related degradation before it becomes permanent damage.
What Bad Advice Gets Wrong About Shading and Solar Arrays
The most damaging piece of advice in the residential solar industry is this: “A little shading won’t make much difference.”
It’s not just wrong. It’s expensive.
The series architecture of standard string inverter systems means that “a little shading” on one panel affects the entire string. The Christmas light effect isn’t a theoretical concern; it’s a measurable, documentable production loss that shows up in your monitoring data every day the obstruction is present.
Here’s where it gets interesting: some installers downplay shading concerns because addressing them properly (through microinverters, power optimizers, or panel repositioning) adds cost to the project. That’s a conflict of interest worth being aware of. The right installer will show you the shade analysis data, explain its implications, and let the numbers guide the technology recommendation.
A second piece of bad advice: “You can always add microinverters later.” Retrofitting a string inverter system with microinverters or power optimizers after installation is significantly more expensive than specifying the right technology upfront. The wiring architecture, panel layout, and inverter sizing all interact. Retrofits rarely deliver the same result as purpose-built systems.
The throughline here is that shading is a system design problem, not a hardware problem. The best mitigation technology in the world can’t fully compensate for a poorly sited array. Get the shade analysis done properly, position the array to minimize exposure during peak production hours, and then choose hardware that matches your actual shading conditions.
Shading is one of the most preventable causes of underperforming solar systems, yet it remains one of the most common issues homeowners discover after installation. Discount Solar brings 10 years of experience and a team of certified installers to every project in Bakersfield and Kern County, conducting formal shade analysis and designing custom solar solutions that protect your annual energy production from day one. Our 25-year equipment warranty covers the long-term investment you’re making. Get your estimate from Discount Solar and start generating clean electricity with a system built to perform in your specific conditions.
Frequently Asked Questions
How much does shading affect solar panel output?
The impact of shading on solar panel output can be surprisingly large. Because solar cells in a string are connected in series, even a small shadow on one cell can reduce the power output of the entire string, not just the shaded module. Depending on system design, partial shading from a tree branch or chimney can reduce annual energy production by 10% to 25% or more, directly affecting your energy bills and return on investment.
What is the ‘Christmas light effect’ in solar panels?
The Christmas light effect describes how shading one solar cell in a series string can drag down the performance of every other cell connected to it, similar to how one faulty bulb in an old string of holiday lights could kill the whole strand. This happens because current must flow equally through all cells in a string. Bypass diodes are built into modern solar panels to reroute current around shaded cells and limit this cascading loss.
What are the best solar panel shading solutions for homeowners?
The most effective solar panel shading solutions depend on your specific situation. Trimming or removing nearby trees eliminates the source. Repositioning panels during system design avoids problem areas. For unavoidable shading, microinverters or power optimizers are the top mitigation technologies, both use maximum power point tracking (MPPT) at the individual module level, preventing one shaded panel from reducing the output of the entire solar array.
Microinverters vs. power optimizers for shading: which is better?
Both microinverters and power optimizers outperform traditional string inverters in shaded conditions by applying MPPT per panel. Microinverters convert DC to AC at each module, offering full independence between panels and easier energy monitoring. Power optimizers condition DC output per panel before sending it to a central inverter, typically at a lower upfront cost. For heavily shaded residential installations, microinverters generally offer the highest energy production gains, while power optimizers offer a strong cost-benefit middle ground.
Can I calculate my solar panel output loss from shading myself?
Yes. A basic solar panel output loss calculation starts with your system’s rated power output and estimated annual energy production under ideal solar irradiance conditions. You then estimate the percentage of your array affected by shading and for how many peak sun hours. Free tools like Google’s Project Sunroof or shade analysis apps can help. A professional shade analysis from a certified installer will give the most accurate picture before committing to a system design.


